From stunning cuts and eye-catching colors, to fuss-free manageability, when it comes to our hair, we all look for less stress in styling, and a little smooth sailing. Okay, a lot of smooth sailing! Unfortunately, and realistically, that’s not always an easy feat, and especially if we’re the not-so-proud owners of the dreaded cowlick.
First, let’s get what a cowlick actually is out of the way. It isn’t a pet cow who shows affection like a dog, by slathering you with wet licks when you get home from work. This kind of amusing and oddly named hair issue is really just about one part of a person’s crowning glory, that shows some rebellion. Constantly.
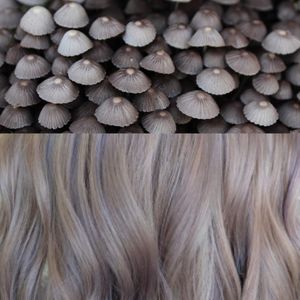
What is a Cowlick
When hair strands grow in the opposite direction from the rest of your hair, they’re called cowlicks. These super pesky growth patterns often leave us frustrated. Especially when they tamper with a stylish cut by sticking up and refusing to settle down. Even worse, is when they take control of a regular hair day and ruin it with stubborn flat patches. There’s also no one singular hair type that earns a cowlick. Whether you have frizzy or thin hair, ruler-straight, or color-treated locks, you could be the grudging owner of a cowlick. Trust us when we say, this tyranny is universal and not choosy about who it latches onto and endlessly frustrates.
Can You Hide a Cowlick, or Tame it?
Rest assured, if you do have a cowlick, it’s not your fault, or because of anything you’re doing wrong. Cowlicks are genetic and can be a bane, but there’s hope for them too. Plenty of celebrities like Blake Lively, Kristin Stewart, and Anne Hathaway have cowlicks to contend with despite their stunning locks, and most regular folk do as well. So, it’s not just a few of us sharing the problem. The good news is, cowlicks can be managed and even styled to more than just a semblance of a chic and cool look. They’re definitely not beyond hope, or repair.
If you’re looking for some simple fuss-free tips and tricks to manage your cowlick, or maybe even get rid of it temporarily, then keep reading. We’ve carefully curated a list of five tried and tested (and top stylist-approved) steps you can follow the next time you want to tackle your cowlick, and come out the winner.
#1 Grow Cowlick Out
Cowlicks usually sprout up at the crown of your head, but they’re also known to be located at the front of your hairline, down the middle. The path they can take is mainly upward, so that’s where you’ll need to focus first. Cutting your hair too short will emphasise your cowlick more, and most top hairstylists advise against doing that. Taming the cowlick is key, and that can be done better when it’s slightly longer and manageable. However, if you prefer a short cropped look, then talk to your stylist and get a cut that supports a little length around your cowlick to help you keep it tamed.
Tip: Side swept bangs are a great choice for short cowlick hair.
#2 Wet and Set
Before you grab your hair dryer and begin battling with your cowlick, you want to make sure at least that area of your hair isn’t dry. You could spritz the cowlick directly with a little water, run a wet comb through it (from the root,) or alternatively give your hair a wash before you begin styling. Softening up the cowlick is important, and makes it much more easy to style in another direction than dry hair.
#3 Heat it Up
One of the best ways to tame your cowlick is to use a Root-tamer iron, and especially if your hair is on the thicker side. Tamer irons have combed edges to help you get to the root of your hair and set your desired direction for your cowlick. Another great option is the Concentrator on your blow dryer. (The detachable pieces that accompany your hairdryer are Concentrators)
Because Concentrators control the air flow of your blow dryer, go ahead and use yours to push your cowlick in the opposite direction when styling. Be careful you don’t turn the heat up too high. A medium heat setting for a Concentrator will work well to set your cowlick without too much trouble.
Tip: When your cowlick has taken your desired direction, hold it down at the root with a no-crease or duckbill clip for extra hold.
#4 Cool it Down
Eventually, your cowlick will cave under the heat from your blow dryer, and go in the direction you want. It will also then stay in place with the help of your crease-free clip. That’s when you should change the setting on your blow dryer to a cooler temperature. Just a few seconds of tempering it down with some cool air will further help secure your cowlick into its new place.
Tip: Switch up the Concentrator on your blow dryer to the Diffuser nozzle for this step.
#5 That Final Touch: The Right Product
Once you’ve neutralized your cowlick in the direction you want, the final styling step would be setting it into place. This is where your choice of a product comes in. There’s a ton of stuff available in the haircare market, and it’s common to get a bit overwhelmed by the sheer numbers, lables, variety, and of course prices out there. What you’re looking for is a flexible hold spray if your hair is not too thick, and something lighter in hold-weight for thin hair.
For thick and heavy locks that can’t be easily set, you should opt for a product with extra strength and hold. Exercise some caution with the amount of product you use. A little can go a long way in good quality setting sprays and creams. Remember, what you’re going for is a style that isn’t stiff and unnatural looking, but brushable and easy-flowing.
Tip: Dry shampoo works wonderfully for that final setting touch. Especially to hold down fine strands from your cowlick that may have escaped the overall taming process.
At the end of it all, managing your cowlick and keeping it neutralized can become common practice in your daily hair care routine. Unlike many hair issues though, the cowlick can’t really be vanquished. But, as long as you remember that your cowlick can be tamed and worked with, and better yet, actually styled beautifully using a few simple tricks, you’re good to go and can look forward to having a great cowlick-free hair day, everyday.